Import Accounts (User Ids and Passwords)
When transfering data from another password manager, it is possible to export data to TXT file, CSV (comma separated values) or similar format.
You may be able to import this file into Guarded Key database.
Here is what you need to do:
STEP 1
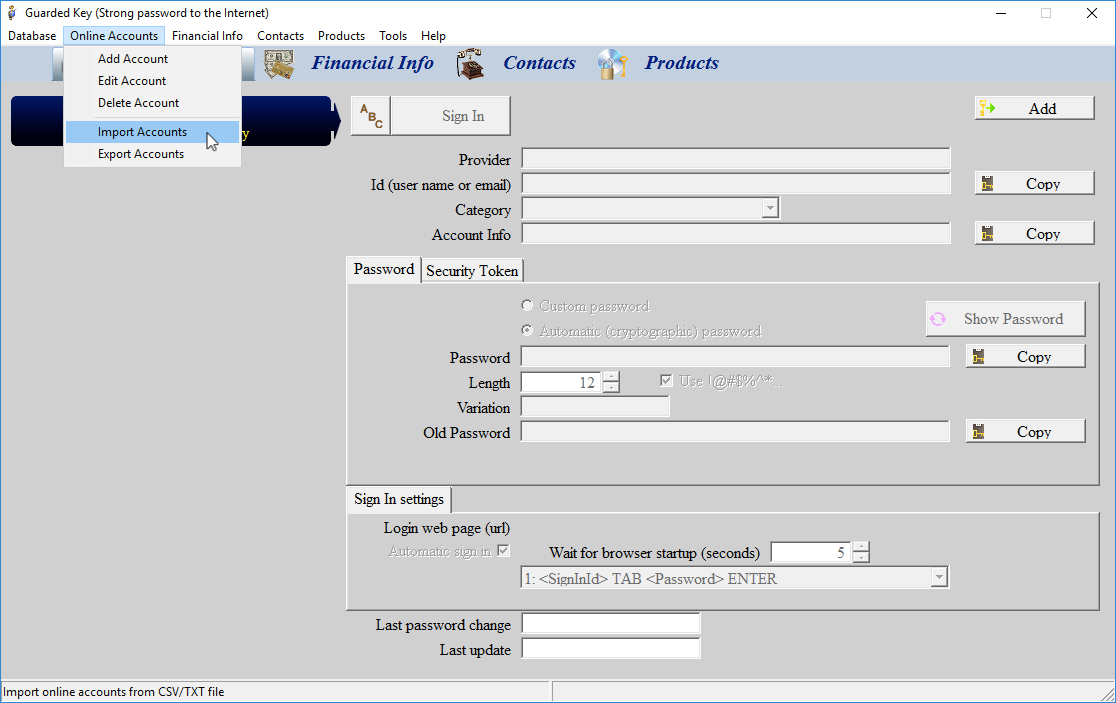
Start Guarded Key and sign in. In main menu select Online Accounts -> Import Accounts.
STEP 2
Click "Open File" and find the text file, which contains records you would like to import.
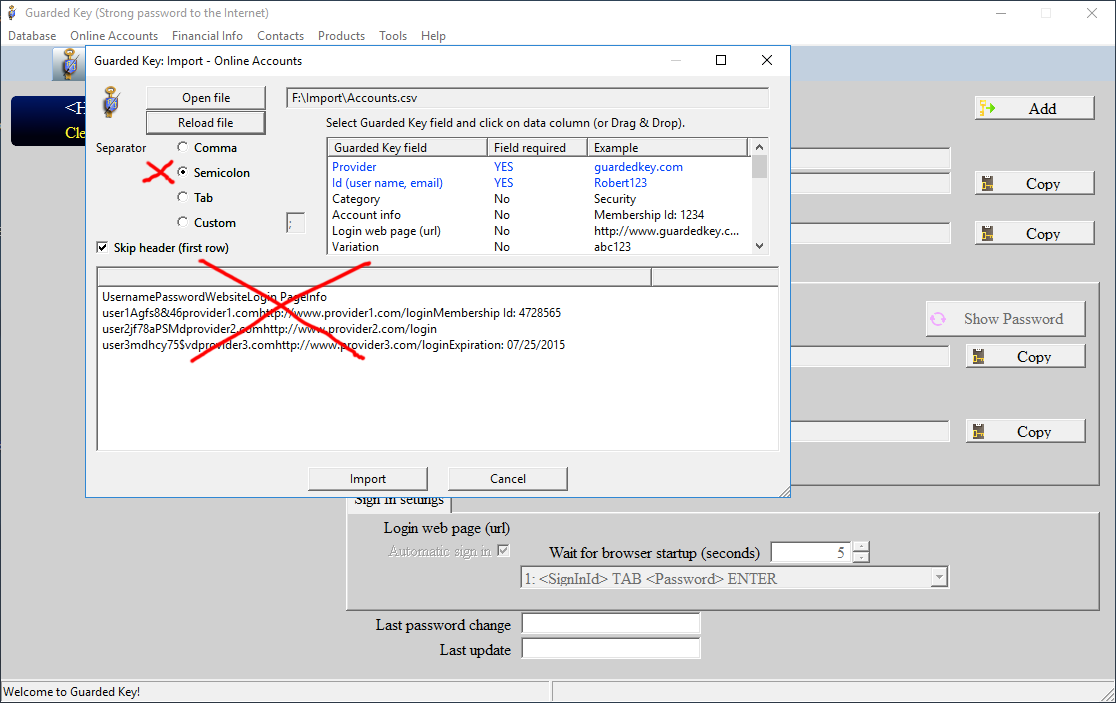
From the screenshot you can see that everything is wrong. Records are shown as badly formatted text without individual fields being separated.
This can happen when using wrong separator. Separator is used to identify where each value starts and ends.
You have to review the records and determine, which separator to use. The most common separator character is comma, semicolon, TAB, single or double quotes.
When you export data, we recommend to use TAB, because other characters may be used in the text and this would break import. TAB character on the other hand is rarely used, especially in database fields.
However the application you used to export data may have limited options and sometimes you have to use file format as it is exported.
STEP 3
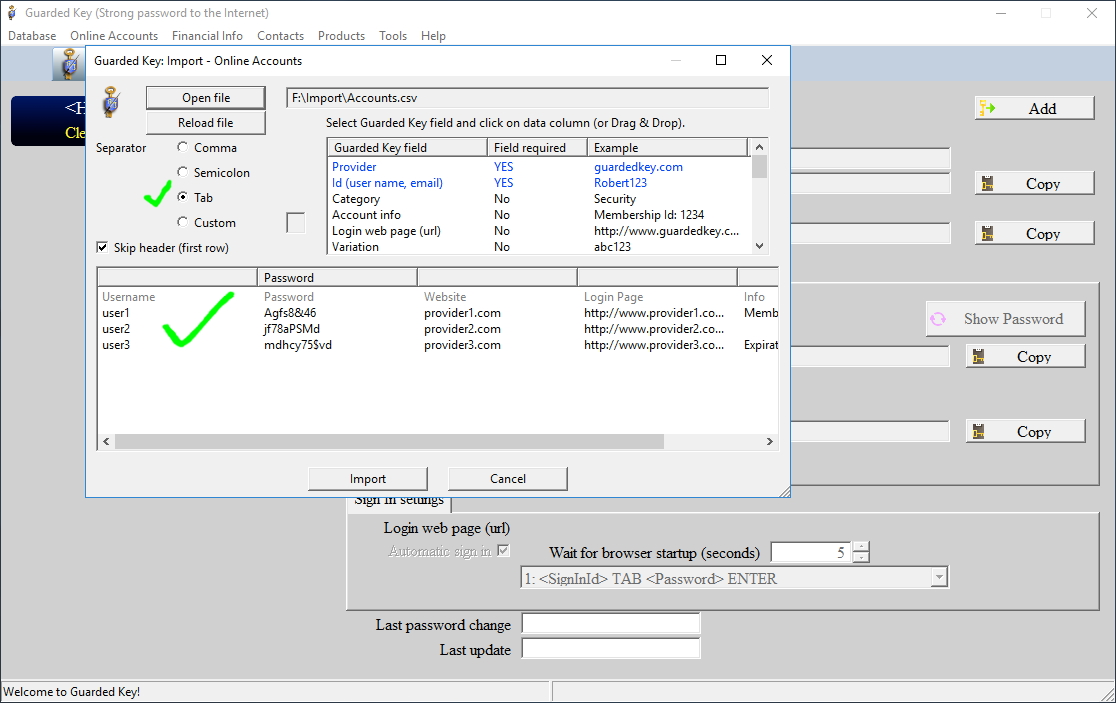
Select one of the predefined separators (Comma, Semicolon, TAB) or enter custom separator (any character is allowed). Click "Reload file" button and check preview of the records.
Everything looks good now and fields are nicely organized into columns. You can also see that the app identified column "Password" and performed assignment automatically.
STEP 4
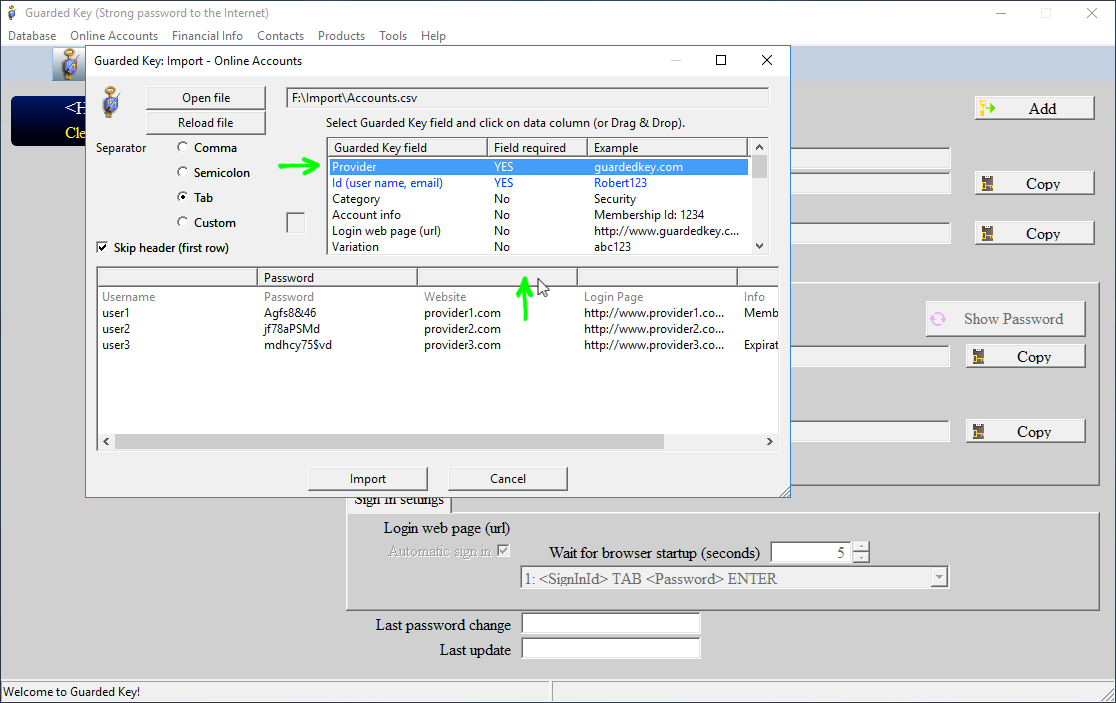
Now we need to assign other fields to columns in the preview. Verify which fields are required by Guarded Key and those have to be assigned to one of the columns, other fields are optional.
In our example, we select "Provider" and click on 3rd column header.
STEP 5
You will notice that the 3rd column header now contains "Provider" label.

STEP 6
Assign the rest of the fields one by one. If some columns appear to be empty, scroll down the list and find records, which have those columns filled with values.
Try to identify and assign as many fields as possible. Only columns matched to fields will be imported to Guarded Key database.
In our example you can see that the first row actually contains names of all fields. That's because the application we used to export data automatically added header into the file.
It is not something we want to import, so we check "Skip header" option and the first row is greyed out. Finally we click on "Import" button.
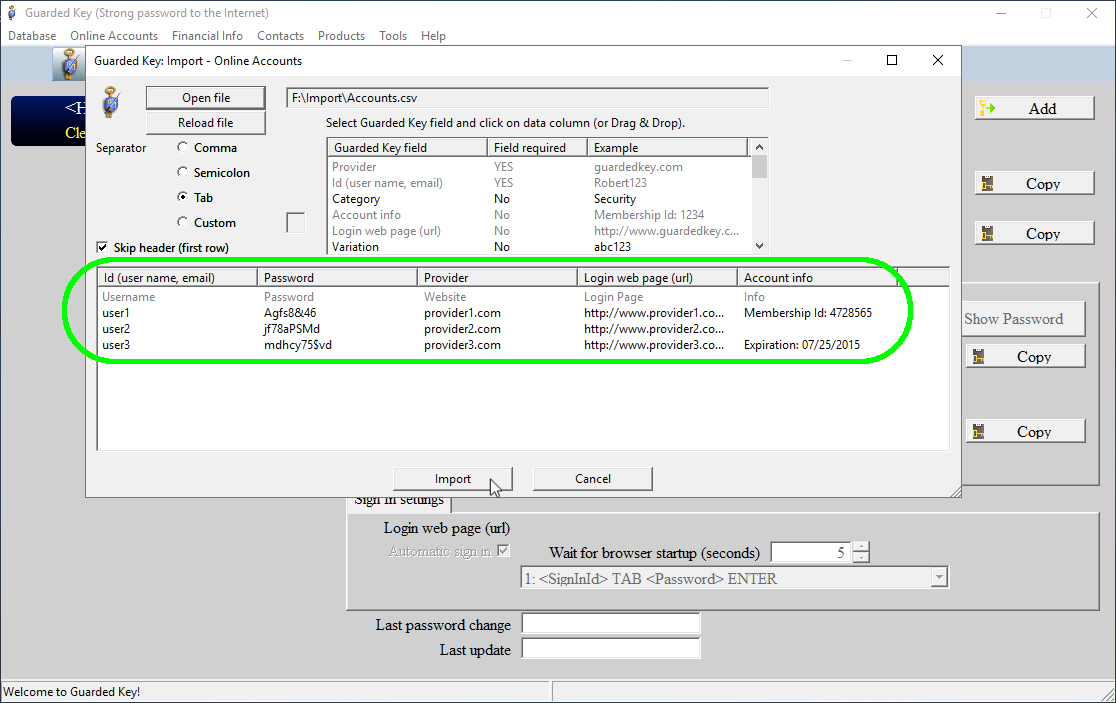
STEP 7
When the import is complete, you should see successfully imported records.
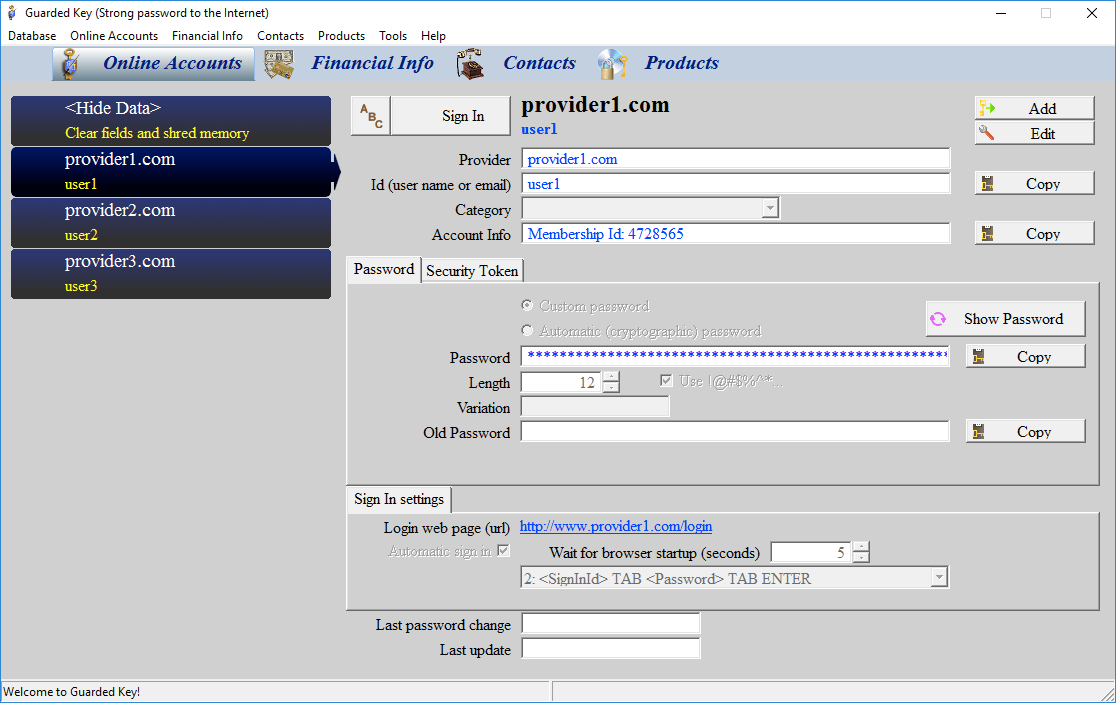
STEP 8
Now we make some final touches to our records. Click "Edit" button, manually enter "Category" and click "Save". When you edit the next record, you can choose existing category instead of entering it manually (this prevents making spelling mistakes).
Setting category for each record will help us organize records into groups. Example of categories: Email, Social Network, Gaming, Shopping, Banking, News, Video streaming, etc.
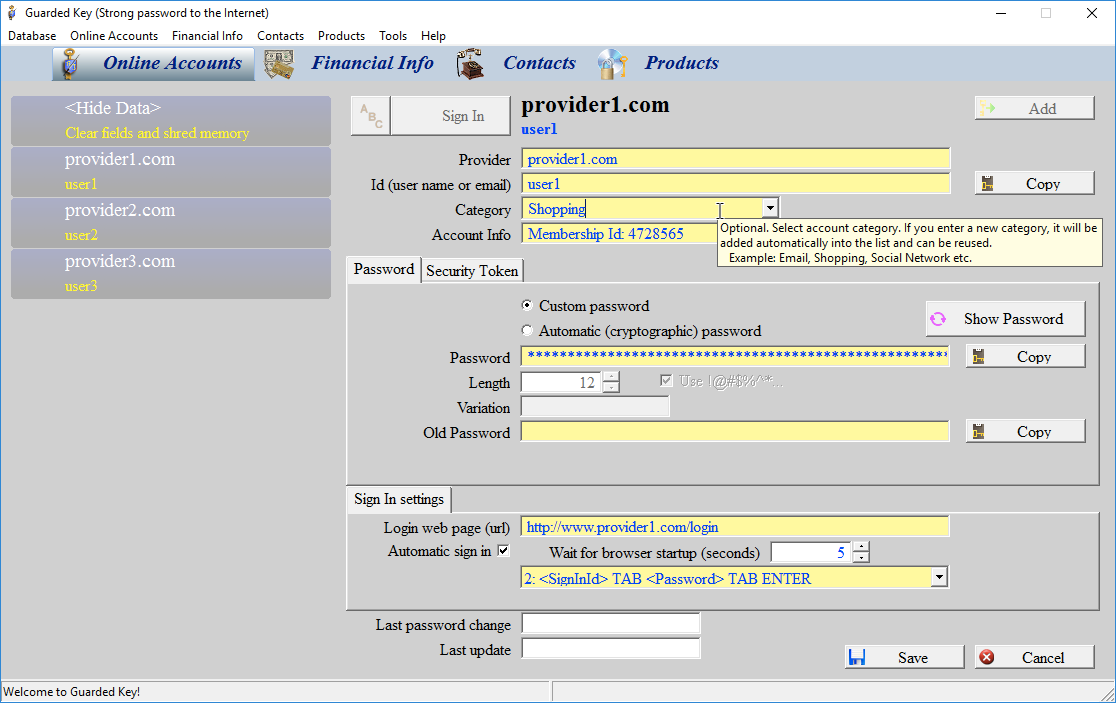
Of course if exported data contain category, group or similar value, it is good idea to assign this column to the field "Category" during import. This will save you good part of the day.
STEP 9
Click on "ABC" button to sort records by Category.
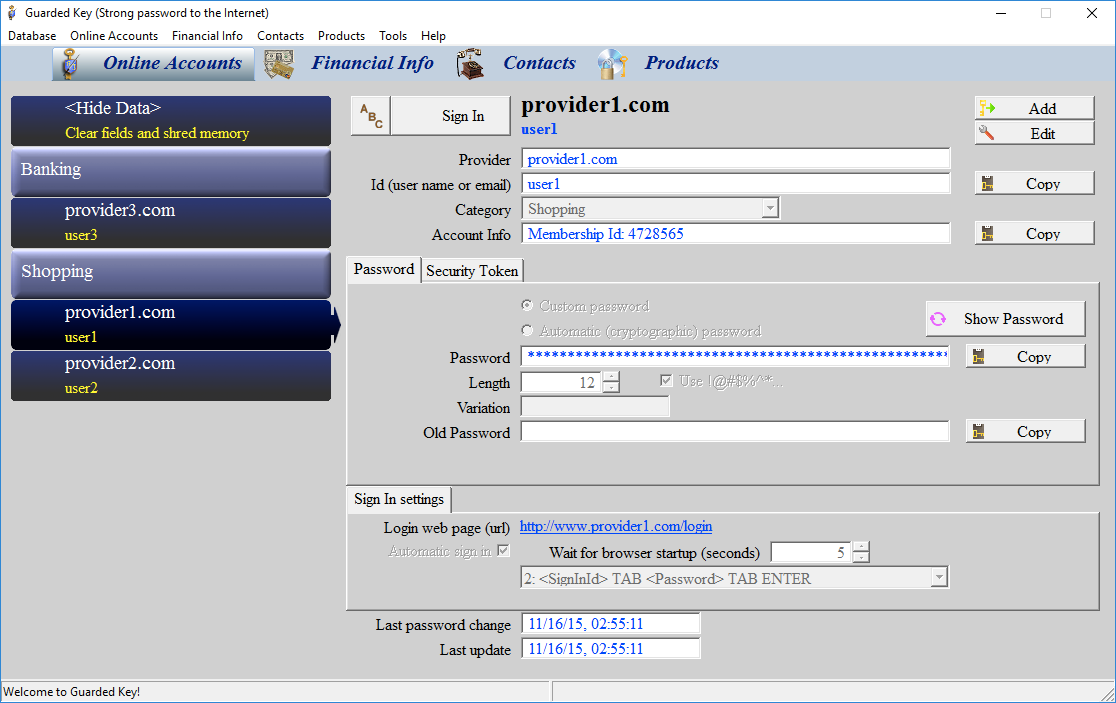
Well done! Now you have your records in Guarded Key database.
Copyright (C) 2011-2016 Robert Janik, Brno, Czech Republic
|